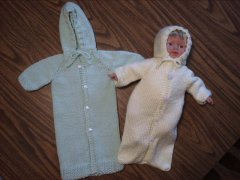
PREEMIE BABY BUNTING
This should fit premature baby to newborn size
7 pounds or less.
8 oz 4 ply Worsted weight yarn
Size 6 needles 2 stitch holders 3 buttons 4 markers Darning needle
Abbreviations:
K Knit P Purl St Stitch
Rib K1, P1, repeat across Stockinette Stitch k1 row, p1 row
Garter knit each row Seed – k1, p1 repeat across, next row p1, k1
K2tog Knit 2 stitches together P2tog Purl 2 stitches together
Inc Increase BO Bind Off YO Yarn Over RS Right Side WS Wrong Side
HOOD
Cast on 60 sts. Knit 2 rows. Next - (eyelet row) K 2, *YO, K2tog, * repeat to last 2 st, k2. Knit 2 rows.
RS – knit across. Next row – purl across. Continue last 2 rows for 6”. Bind off. Cut yarn leaving about 12” to use to sew back seam. Fold piece in half and sew the seam with the bind off edge. Open hood. At the edge that has the eyelet to the back seam (the bind off edge) to the other eyelet edge, you will pick up 40 stitches.
Add yarn.
NECKBAND
(you may design neckband in many variations: 6 rows of rib stitches; or garter stitches or seed stitches)
WS – beginning your 6th row – continue pattern of choice, place marker after 8 sts; after 6th sts; after 12 sts; after 6 sts, continue to remaining 8 sts. These markers will designate the right front, sleeve, back, sleeve and left front areas.
SHOULDER SHAPING
Row 1 – k across row inc 1 st before and after each marker.
Row 2 – k5, p across (slipping markers), to last 5 sts, K5.
Repeat last 2 rows four times, ending with row 2. There will be 5 purl ridges after the neckband row.
BUTTONHOLE
RS – k2, yo, k2tog, (buttonhole) k across continuing to inc 1 st before and after each marker.(place a pin at the end of the row as this will be button placement)
Continue pattern of rows 1 & 2 until 120 sts.
DIVIDE FOR SLEEVES AND BODY (remove markers when you get to them) RS- k18, cast on 4 sts, slip next 26 sts (left sleeve) onto stitch holder, k32 sts (back) cast on 4 sts, slip next 26 sts (right sleeve) onto stitch holder, k18. Row 1 – k5, p across to last 5 st, k5 (76 st) Row 2 – k across. Continue last 2 rows until 9 purl ridges from 1st buttonhole. Create 2nd buttonhole. RS- k2, yo, k2tog, k across (place a pin at the end of the row as this will be button placement) Repeat pattern of rows 1 & 2 until 9 purl ridges from 2nd buttonhole. Make 3rd buttonhole as above. Continue pattern of rows 1 & 2 until 9 purl ridges from 3rd buttonhole. Work rows 1 and 2 until piece measures desired length. ( I made mine 12” measuring from bottom of armhole)
BOTTOM EDGE
Knit 2” of design that you chose from the neckband. (rib, garter or seed stitch). Bind off, leaving yarn about 18” to sew seam. At the center area, match up the button and buttonhole ridges. Over lap the buttonhole ridge on top of the button ridge. Pin or sew button and buttonhole ridges together. Take piece and fold in half so the buttonhole edge is in the center. Pin buttonhole to center. Sew seam across the bind off edge.
SLEEVES
Pick up stitches from stitch holder. Join yarn. Stockinette stitch (k1 row, p1 row) for 20 rows.
Cuff will be done in 6 rows of stitch design to match the neckband. (rib, garter or seed stitches.)
Bind off leaving yarn approximately 10” and sew seam. Do the same with the other sleeve.
FINISH
Sew buttons onto button band to correspond where buttonholes are from the buttonhole band.
Make a crochet chain approximately 28” long. Weave this chain in the eyelet at the hood as a draw string.
Knot both ends of draw string several times.
Designed By Lois Walters May, 2004